Classic Chocolate Snowball Cookies
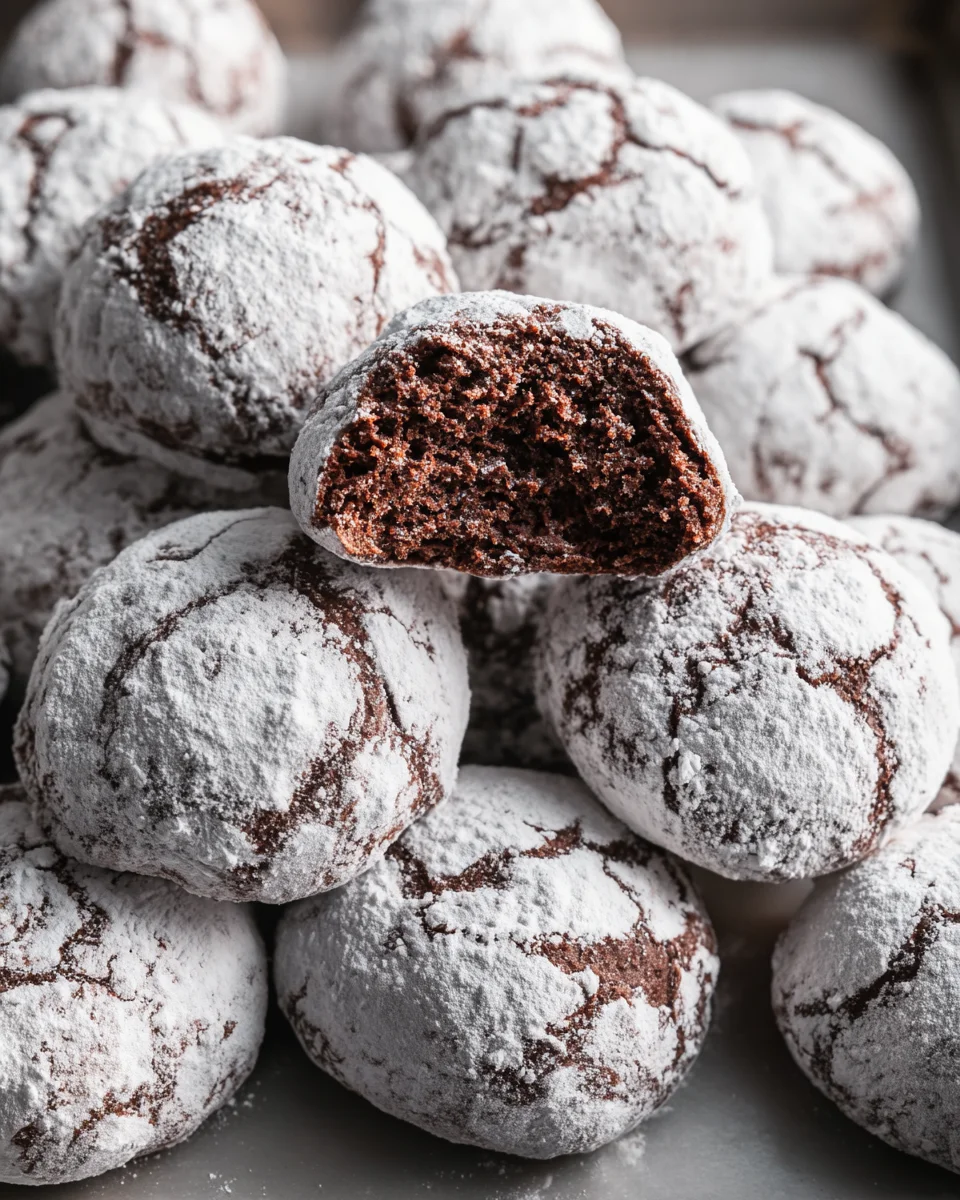
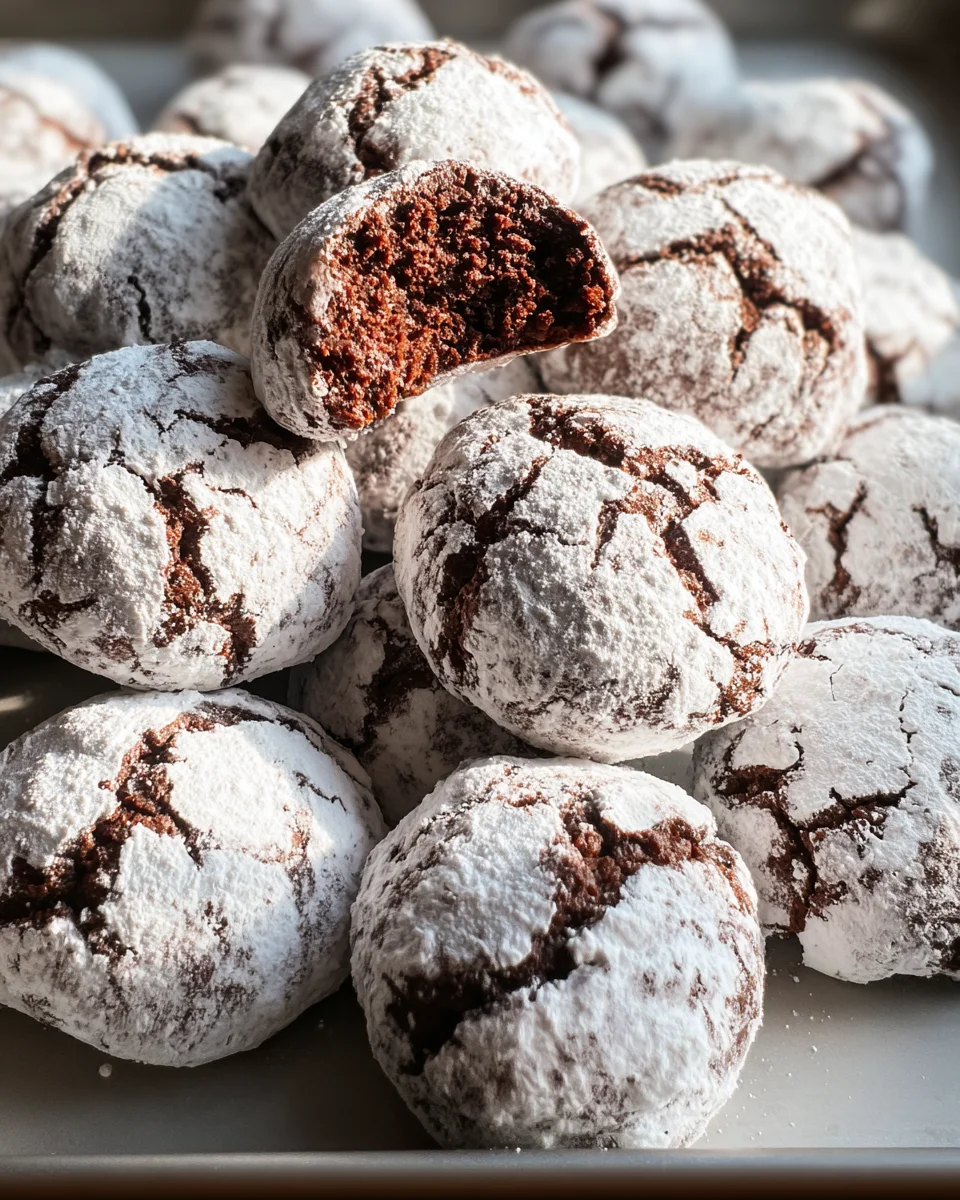
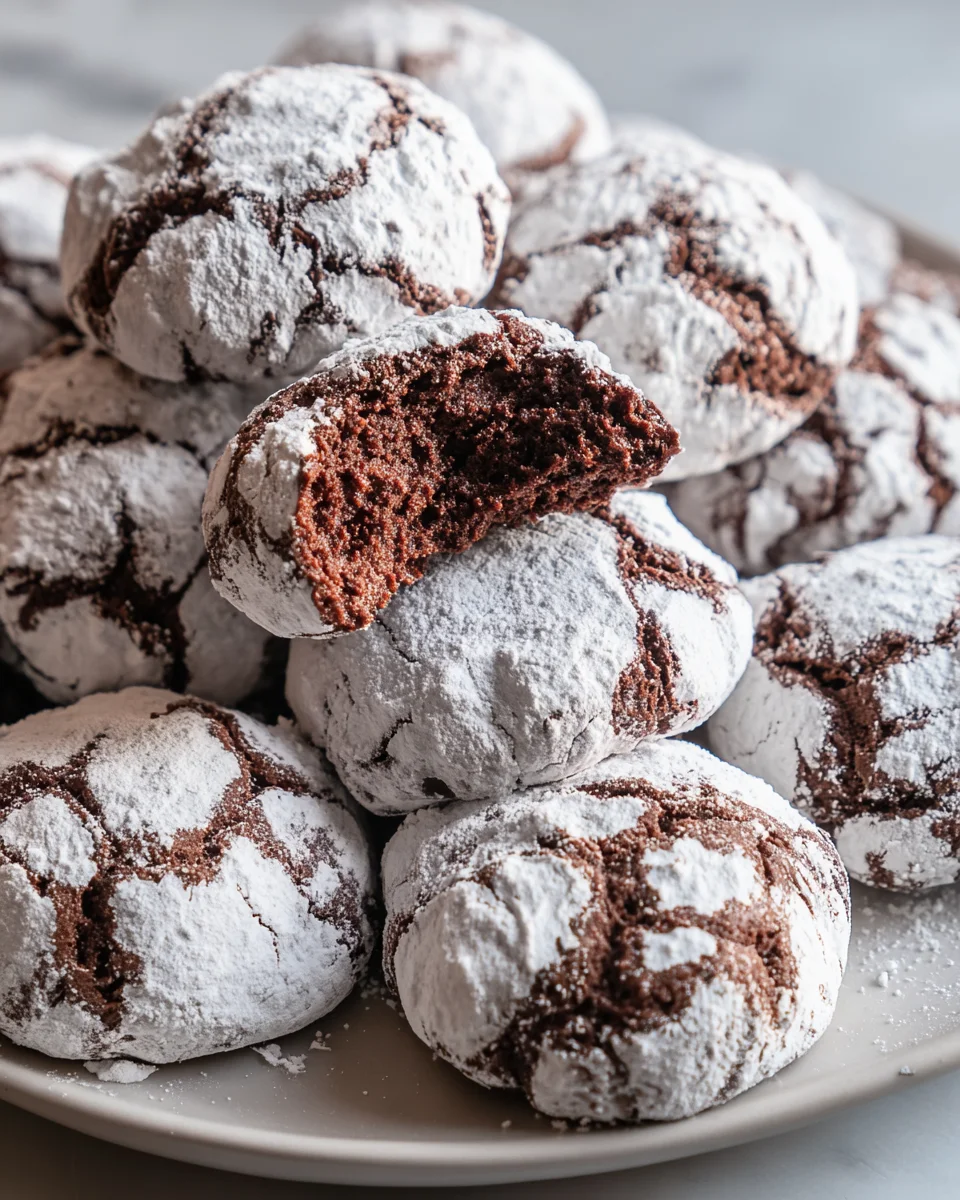
Classic Chocolate Snowball Cookies are a delightful treat that brings together the rich flavor of chocolate and a soft, melt-in-your-mouth texture. These cookies are perfect for holiday gatherings, family get-togethers, or simply to satisfy your sweet tooth. With their snowy powdered sugar coating, they not only look beautiful but also taste heavenly, making them a favorite among both kids and adults alike.
Why You’ll Love This Recipe
- Easy to Make: With simple ingredients and straightforward steps, these cookies come together in no time.
- Rich Flavor: The combination of cocoa powder and vanilla creates a deep chocolate flavor that’s hard to resist.
- Versatile Options: Customize with nuts or mini chocolate chips to suit your taste preferences.
- Perfect for Any Occasion: Whether it’s Christmas, birthdays, or just a rainy day, these cookies fit right in.
- Great for Sharing: Bake a batch and share them with friends or family; they make an excellent gift!
Tools and Preparation
Before diving into the baking process, gather the necessary tools to ensure smooth preparation. Having everything ready will help you focus on creating these delicious Classic Chocolate Snowball Cookies.
Essential Tools and Equipment
- Stand mixer or hand mixer
- Mixing bowls
- Whisk
- Baking sheets
- Parchment paper or silicone mats
- Wire rack
Importance of Each Tool
- Stand mixer or hand mixer: Saves time and effort when creaming butter and sugar to achieve the perfect fluffy texture.
- Mixing bowls: Essential for keeping ingredients organized while mixing dry and wet components separately.
- Parchment paper or silicone mats: Prevents cookies from sticking to the baking sheet, allowing for easy removal post-baking.
Ingredients
For the Dough
- 1 cup (2 sticks) unsalted butter, softened – Try Kerrygold Butter for premium flavor and texture.
- 1/2 cup powdered sugar, plus extra for rolling – Domino Confectioners’ Sugar is my go-to for smooth coatings.
- 1 teaspoon vanilla extract
- 1 3/4 cups all-purpose flour – King Arthur Flour delivers consistent, high-quality results.
- 1/4 cup unsweetened cocoa powder – Ghirardelli Premium Cocoa Powder is perfect for rich chocolate notes.
- 1/2 teaspoon salt
- 1 cup finely chopped pecans or walnuts, optional
- 1/2 cup mini chocolate chips, optional
How to Make Classic Chocolate Snowball Cookies
Step 1: Preheat the Oven
Set your oven to 350°F (175°C). Line two baking sheets with parchment paper or silicone baking mats for easy cleanup.
Step 2: Cream the Butter and Sugar
In a large mixing bowl, use a stand mixer or hand mixer to beat the softened butter and powdered sugar until light and fluffy. Add the vanilla extract and mix until combined.
Step 3: Mix the Dry Ingredients
In a separate bowl, whisk together the flour, cocoa powder, and salt. Gradually add the dry ingredients to the butter mixture, mixing just until combined.
Step 4: Fold in the Nuts and Chocolate Chips
Stir in the finely chopped nuts and mini chocolate chips (if using) until evenly distributed throughout the dough.
Step 5: Shape the Cookies
Scoop out about a tablespoon of dough and roll it into a ball. Place the dough balls onto the prepared baking sheets, spacing them about an inch apart.
Step 6: Bake
Bake the cookies in the preheated oven for 12-15 minutes, or until the edges are set and the bottoms are lightly browned. Be careful not to overbake; these cookies should remain soft and tender inside.
Step 7: Roll in Sugar
Allow the cookies to cool slightly on the baking sheet for about 5 minutes. While still warm, roll each cookie in a generous amount of powdered sugar, ensuring they’re fully coated. Place them on a wire rack to cool completely, then give them one more roll in powdered sugar for that classic snowball look.
How to Serve Classic Chocolate Snowball Cookies
Classic Chocolate Snowball Cookies are delightful treats that can be enjoyed in various ways. Whether you’re hosting a holiday gathering or simply indulging at home, these cookies pair beautifully with other flavors.
Pair with Coffee
- Enjoy with a cup of brewed coffee for a rich flavor combination.
- Espresso enhances the chocolate, making each bite even more satisfying.
Serve with Milk
- A classic pairing; the cookies’ sweetness balances perfectly with cold milk.
- Try whole milk for creaminess or almond milk for a nutty twist.
Create Dessert Platters
- Arrange the cookies on a decorative platter alongside other desserts.
- Mix with mini cheesecakes or fruit tarts for an appealing variety.
Gift Packages
- Package these cookies in festive boxes as homemade gifts.
- Add a personal touch with handwritten notes or labels.
Ice Cream Sandwiches
- Use two cookies to create delicious ice cream sandwiches.
- Choose your favorite flavor like vanilla or mint chocolate chip for added fun.
Holiday Treat Bags
- Fill small bags with these cookies for holiday gatherings.
- Tie them off with ribbons for a charming presentation.
How to Perfect Classic Chocolate Snowball Cookies
To ensure your Classic Chocolate Snowball Cookies turn out perfectly every time, follow these simple tips.
-
Use Room Temperature Ingredients: Allow butter to soften before mixing. This creates a smoother dough and better texture.
-
Don’t Overmix: Combine ingredients just until they are incorporated. Overmixing can make the cookies tough instead of tender.
-
Chill the Dough: If time allows, refrigerate the dough for 30 minutes before baking. This helps the cookies hold their shape and enhances flavor.
-
Watch Baking Time: Keep an eye on your cookies while they bake. They should be set at the edges but still soft in the center when you take them out.
-
Double Roll in Powdered Sugar: For that signature snowball effect, roll the cookies in powdered sugar both when warm and again after they cool completely.
Best Side Dishes for Classic Chocolate Snowball Cookies
When serving Classic Chocolate Snowball Cookies, complement them with side dishes that enhance their rich chocolate flavor. Here’s a selection of delicious options:
-
Vanilla Ice Cream: Creamy vanilla ice cream pairs wonderfully, adding richness and contrast to the chocolate cookies.
-
Fruit Salad: A refreshing fruit salad provides a light and bright contrast to the dense sweetness of the cookies.
-
Hot Cocoa: Serve these cookies with steaming hot cocoa topped with whipped cream for a cozy winter treat.
-
Cheese Platter: Include mild cheeses like brie or goat cheese to balance the sweetness of the cookies with savory flavors.
-
Chocolate Ganache Dip: For an extra indulgent experience, serve melted chocolate ganache as a dip alongside your cookies.
-
Spiced Nuts: Offer spiced nuts as a crunchy side dish that complements the soft texture of the snowball cookies perfectly.
-
Caramel Sauce: Drizzle warm caramel sauce over each cookie before serving for an added layer of sweetness and gooeyness.
-
Coffee Cake: A slice of moist coffee cake works well as another sweet treat that pairs nicely with these chocolate delights.
Common Mistakes to Avoid
Making Classic Chocolate Snowball Cookies can be a delightful experience, but it’s easy to make some common mistakes. Here are a few to keep in mind.
- Overmixing the Dough: Mixing too much can lead to tough cookies. Mix just until combined for tender results.
- Skipping the Cooling Step: Rolling cookies in powdered sugar while too hot can cause the sugar to melt. Let them cool slightly before rolling.
- Not Measuring Ingredients Accurately: Using a kitchen scale or proper measuring cups ensures you have the correct amounts for perfect texture.
- Baking at Incorrect Temperatures: Always preheat your oven. An oven that’s too hot or too cold can affect baking time and results.
- Ignoring Storage Tips: Not storing cookies properly can lead to them getting stale. Follow storage instructions for best results.
Storage & Reheating Instructions
Refrigerator Storage
- Store in an airtight container for up to one week.
- Place parchment paper between layers of cookies to prevent sticking.
Freezing Classic Chocolate Snowball Cookies
- Freeze in an airtight container for up to three months.
- Separate layers with parchment paper to maintain shape.
Reheating Classic Chocolate Snowball Cookies
- Oven: Preheat to 350°F (175°C) and warm for 5-10 minutes for a fresh-out-of-the-oven taste.
- Microwave: Heat one cookie on low power for 10-15 seconds; check if warm and enjoy!
- Stovetop: Use a skillet over low heat, covered, for a couple of minutes until warmed through.
Frequently Asked Questions
Here are some common questions about making Classic Chocolate Snowball Cookies along with their answers.
How do I make Classic Chocolate Snowball Cookies gluten-free?
You can substitute all-purpose flour with a gluten-free blend that measures cup-for-cup.
Can I use different nuts in Classic Chocolate Snowball Cookies?
Absolutely! You can use any nuts you prefer, such as almonds or hazelnuts, based on your taste.
What is the best way to roll these cookies in powdered sugar?
Roll them while they are still warm but have cooled enough not to melt the sugar. This gives them that classic look!
How long do Classic Chocolate Snowball Cookies last?
When stored properly, they last about one week in the refrigerator and up to three months in the freezer.
Final Thoughts
Classic Chocolate Snowball Cookies are not only delicious but also versatile. They can be customized with different nuts or chocolate chips based on your preferences. Whether you’re baking for holidays or special occasions, these treats are sure to bring joy and satisfaction. Try making them today!
Classic Chocolate Snowball Cookies
- Total Time: 30 minutes
- Yield: Approximately 24 cookies 1x
Description
Classic Chocolate Snowball Cookies are a delightful treat that combines rich chocolate flavor with a soft, melt-in-your-mouth texture. These cookies are ideal for holiday gatherings, family get-togethers, or satisfying your sweet cravings. Coated in snowy powdered sugar, they not only look stunning but taste heavenly—making them an all-time favorite for both kids and adults.
Ingredients
- 1 cup unsalted butter, softened
- 1/2 cup powdered sugar (plus extra for rolling)
- 1 teaspoon vanilla extract
- 1 3/4 cups all-purpose flour
- 1/4 cup unsweetened cocoa powder
- 1/2 teaspoon salt
- 1 cup finely chopped nuts (pecans or walnuts), optional
- 1/2 cup mini chocolate chips, optional
Instructions
- Preheat your oven to 350°F (175°C) and line baking sheets with parchment paper.
- In a mixing bowl, cream the softened butter with powdered sugar until fluffy. Add the vanilla extract and mix well.
- In another bowl, whisk together the flour, cocoa powder, and salt. Gradually add this mixture to the butter mixture until just blended.
- Gently fold in the nuts and mini chocolate chips if using.
- Scoop tablespoon-sized portions of dough and roll into balls; place them on prepared baking sheets about an inch apart.
- Bake for 12-15 minutes until edges are set but cookies remain soft in the center.
- Allow to cool slightly before rolling in powdered sugar, then transfer to a wire rack to cool completely.
- Prep Time: 15 minutes
- Cook Time: 15 minutes
- Category: Dessert
- Method: Baking
- Cuisine: American
Nutrition
- Serving Size: 1 cookie (20g)
- Calories: 92
- Sugar: 6g
- Sodium: 25mg
- Fat: 6g
- Saturated Fat: 4g
- Unsaturated Fat: 2g
- Trans Fat: 0g
- Carbohydrates: 10g
- Fiber: <1g
- Protein: <1g
- Cholesterol: 15mg

